How to Record Gameplay on Android: Traffic Rider Settings & Tips
Recording Traffic Rider on Android is a great way to save your best rides, share impressive overtakes, or create tutorials for other players. However, getting a good recording takes more than simply pressing the record button. Your phone needs to handle the game and video capture together without causing unnecessary lag or losing audio.
This guide explains how to record Traffic Rider gameplay, select suitable video settings, solve common recording problems, and take clear screenshots. Start with a short test recording and check the result before moving on to a longer gaming session.
Whether you are showing a Career Mode mission or demonstrating motorcycles in Traffic Rider MOD APK, preparing your recording settings beforehand will help you focus on the gameplay.
How to Screen Record Games on Android
The quickest way to record Traffic Rider is to use your phone’s built-in screen recorder, if one is available.
- Swipe down from the top of your screen to open Quick Settings.
- Find the Screen Record or Screen Recorder option.
- Select your preferred audio source, if the option is available.
- Start recording and wait for the countdown to finish.
- Open Traffic Rider and play a short section of the game.
- Stop the recording using the on-screen controls or notification.
- Open your Gallery or Photos app and watch the saved video.
The exact steps depend on your phone’s manufacturer, Android version, and software interface. Some devices allow you to add the screen recorder through the Quick Settings editing menu. If you cannot find it, check your phone’s settings or the manufacturer’s support information before installing another application.
You can also consult Google’s official Android help resources for general information about screenshots and screen recording. Keep in mind that different phones may offer different recording features, even when they run similar Android versions.
Prepare Traffic Rider Before Starting a Recording
Before capturing gameplay, play a short session without recording. This helps you understand how the game normally performs on your device. If the bike already responds slowly or the game stutters, investigate those issues before testing the recorder.
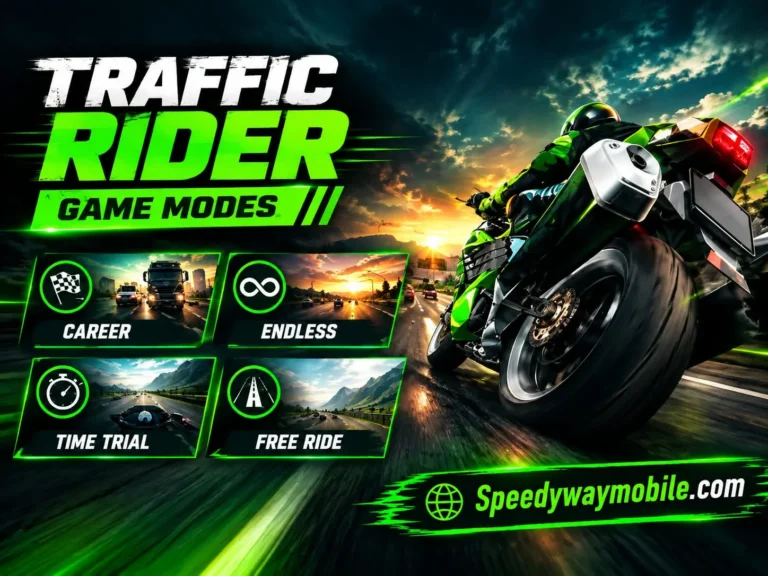
For more predictable results, choose a familiar motorcycle and a route you can repeat. Free Ride is useful for capturing general riding footage, while Career Mode works well when you want to demonstrate a particular mission. You can also explore our Traffic Rider controls and game modes guides for more gameplay tips.
Check your available storage and close unnecessary downloads or demanding background applications. Turn on Do Not Disturb if you want to prevent notifications from interrupting your video or exposing private messages.
Make sure your phone has enough battery for the session. If the device becomes noticeably hot while charging, try a short recording without the charger and compare the results.
Decide on the video orientation before you begin. Landscape recording is usually a practical choice for Traffic Rider because it provides a wider view of the road. For your first test, leave optional features such as facecam, microphone commentary, and touch indicators disabled. You can enable them later if your tutorial requires them.
Set Up, Test, and Review Your Android Recording
Built-In Screen Recorder or Third-Party App?
Start with the screen recorder that comes with your phone. It is often the simplest option because there is no need to install another application. Check the available audio and video settings, record a short ride, and review the saved file.
Some supported Samsung Galaxy devices, for example, provide options for recording sound and adjusting video quality. The available controls vary by device and software version, so do not assume that every model has identical features.
If your built-in recorder does not provide what you need, look for a maintained screen recording application from a trusted app store. Before installing one, check whether it supports device audio on your phone, offers suitable video settings, provides a reliable stop control, and explains its requested permissions.
Always test the exported video before recording a long session.
Screen recording may require system permission or confirmation. Microphone access is relevant if you want to include your voice. Be cautious of applications requesting unrelated permissions under the claim that they improve gaming performance. A third-party recorder also cannot guarantee that every game’s internal audio will be available for capture.
Best Screen Recorder Settings for Android
The best settings depend on your phone’s performance and the quality you want. Higher resolution and frame rates can improve the appearance of your video, but they may also increase processing demands, storage use, and heat.
Use the following presets as starting points if your screen recorder supports them.
Recommended 720p and 1080p Recording Presets
| Recording goal | Suggested starting settings | What to check |
| Reduce processing load | 720p at 30 FPS | Readable game text and steady movement |
| Balance detail and performance | 1080p at 30 FPS | Game responsiveness, temperature, and file size |
| Capture smoother motion | 1080p at 60 FPS | Whether your phone maintains stable gameplay and recording |
Resolution
Resolution affects how much detail appears in the saved video. A higher resolution can make small menus, score displays, and other interface elements easier to read, but it also requires more processing.
If your phone struggles with recording, try 720p before moving to 1080p. Increasing the resolution of a video after recording cannot restore details that were never captured.
For a tutorial focused on settings or menus, clear text may be more important than extremely smooth motion.
Frame Rate
Frame rate describes how many frames appear each second. A stable 60 FPS recording can look smoother than a 30 FPS recording when the game and recorder maintain that rate consistently.
However, a display with a 120 Hz refresh rate does not automatically mean your saved recording contains 120 distinct frames per second.
If Traffic Rider becomes less responsive when recording begins, lower the capture frame rate or resolution and test again.
Bitrate
Bitrate affects how much data is used to represent the video. Begin with the recorder’s default or automatic quality setting.
If the saved footage looks blocky, especially during fast movement, try a higher quality setting and compare the results. Remember that increasing bitrate can improve compression quality, but it does not fix dropped frames caused by performance problems.
Video Codec
Some recorders let you choose between formats such as H.264 and HEVC. Select a format that works with your editing software and the platform where you plan to publish the video.
If you are unsure which option to use, keep the default. Change one setting at a time so you can identify which adjustment actually improves the recording.
How to Record Game Audio on Android
Game sound makes Traffic Rider videos more engaging because viewers can hear the engine, traffic, and other in-game effects.
To capture audio:
- Open your screen recorder’s audio settings.
- Select Device Audio, Media Sounds, or a similar option for game sound.
- Choose the microphone option if you want to record your voice.
- If supported, enable both sources to capture game audio and commentary together.
- Check that sound is enabled inside Traffic Rider.
- Record a short sample and play it back.
Not every Android recorder offers the same audio options. Some can record internal audio, while others provide microphone capture only.
Android 10 introduced a playback-capture API, but actual audio recording still depends on the source application’s policies and the recording tool. Therefore, running Android 10 or a later version does not guarantee that every game’s sound can be captured.
If your video has no game audio, check the selected source first. Try the built-in recorder if you are using a third-party app. You can also test another application that permits audio capture to help determine whether the problem is specific to Traffic Rider.
If you want to include live commentary, headphones may help prevent the phone’s speaker from being picked up by the microphone. Test your headset beforehand because audio routing can vary between devices. If recording your voice causes problems, capture the gameplay audio first and add narration during editing.
How to Record Traffic Rider Without Lag
A short, repeatable test can help you identify whether recording affects the game’s controls, performance, or saved video.
| Step | What to do | What to observe |
| 1 | Play a familiar route without recording. | Check normal steering and gameplay speed. |
| 2 | Record for 30–60 seconds using moderate settings. | Keep the motorcycle, route, and controls consistent. |
| 3 | Play the saved video at normal speed. | Check motion, sound, and text clarity. |
| 4 | Change one setting and repeat the test. | Compare the results and keep the better setup. |
If the game slows down as soon as recording begins, reduce the recording resolution or frame rate. You can also disable optional overlays and other features that increase the workload.
If the game feels normal but the exported video stutters, check the recording settings, available storage, and video player. Try opening the same file in another compatible player before deciding that the recording itself is damaged.
For longer gameplay videos, perform an extended test after the initial short sample. A setting that works well while your phone is cool may become less reliable as the device heats up.
Take a break if the phone becomes excessively warm. Avoid recording in direct sunlight or placing the device on surfaces that trap heat.
It can also help to note your settings and results. For example, you might record at 1080p and 30 FPS with device audio enabled and no facecam. Write down whether the text was clear and the gameplay remained smooth. This gives you a useful reference when recording future videos.
Fix Silent, Choppy, or Incomplete Recordings
Recording problems can have several causes. Use the table below to narrow down the issue before changing your game settings or reinstalling anything.
| Problem | What to check | What to try |
| No game sound | Audio source and in-game volume | Record a short test and confirm that the recorder supports device audio. |
| Echo or background noise | Microphone and speaker setup | Use headphones or add voice commentary during editing. |
| Game slows down during recording | Resolution, frame rate, and overlays | Lower one setting and test without optional features. |
| Saved video stutters | Video file and playback application | Try another player and reduce the capture workload if necessary. |
| Recording stops early | Storage, temperature, or interruptions | Back up existing files, free space safely, and try a shorter recording. |
| Black screen in the recording | Selected app and capture restrictions | Start a fresh capture and check whether the content permits screen recording. |
Avoid clearing Traffic Rider’s app data as a routine way to fix recording problems. Depending on how the game stores its progress, doing so could remove local data.
Likewise, do not delete the only copy of an important video just to make room. Transfer or back up recordings before removing files.
If the screen turns black or the sound disappears after switching applications, stop the recording and start a new capture of the intended game. Pay attention to the system’s screen-sharing or capture prompt, as permissions granted for one application may not cover everything you open afterward.
How to Take Clear Screenshots While Playing
If you need a still image instead of a video, use your phone’s screenshot feature. A direct screenshot will often preserve interface details more clearly than taking a frame from a compressed recording.
On many Android devices, pressing Power + Volume Down together captures the current screen. Your phone may also offer a gesture, gaming toolbar, or another shortcut. Test the method before attempting to capture a difficult moment.
Choose a scene where the information is easy to see. The garage, mission results, and other relatively still screens can work well for tutorials. Avoid notification banners that cover important details, and keep an original copy before cropping or adding labels.
When sharing screenshots, send the original image as a file when possible. Repeatedly forwarding compressed copies can reduce quality. Enlarging a small crop may also make text and interface elements appear blurry.
For instructional content, a clear screenshot with one useful annotation is often more effective than an aggressively sharpened image.
Try to capture screenshots during a safe or uncomplicated part of the game. Reaching for physical buttons during a difficult overtake can interrupt your ride. If necessary, make a separate demonstration run specifically for screenshots.
Turn Your Recording Into a Useful Traffic Rider Video
A good gameplay video should have a clear purpose. You might want to demonstrate an overtake, explain a control setting, show a mission objective, or point out a mistake that other players can avoid.
Start recording shortly before the important action. Leave enough footage at the beginning to establish what is happening, then stop once the result is clear. You can trim unnecessary waiting screens during editing, but keep the context viewers need to understand the demonstration.
For a tutorial, connect the footage to a specific lesson. For example, a clear explanation of lane selection and safe overtaking can be more helpful than a fast ride with no commentary.
If you are comparing motorcycles, use the same route and recording settings for each bike. Mention their upgrade levels as well, so viewers can understand the differences fairly. You can also refer to our Traffic Rider bikes and upgrades guide for additional information.
When exporting, preserve the original video’s orientation and avoid changing a 30 FPS recording to 60 FPS simply to display a larger number. Artificially increasing the frame rate does not recreate motion that was never captured.
After uploading the video, watch the published version. Some platforms compress videos, which can affect fine details and overall clarity.
Take Better Photos of Your Gaming Setup
If you are creating a thumbnail for a Traffic Rider tutorial, a separate photograph of your gaming setup can make the design more personal. Arrange your phone, stand, or controller against a tidy background, and leave some clear space for the title.
You can explore camera applications such as LMC Camera for photographing your setup, but availability and compatibility depend on your particular device. Check that an application supports your handset before installing it. Use a screen recorder or screenshot feature to capture the actual gameplay.
Clean your camera lens and use soft lighting to reduce reflections on the phone’s screen. Take the setup photograph separately, then combine it with a gameplay screenshot in your preferred thumbnail editor.
Keep the thumbnail text short and readable. Since thumbnails often appear at small sizes, a simple layout with a clear subject usually works better than one crowded with words and effects.
Final Checklist Before Sharing Your Gameplay
Before publishing your Traffic Rider video, play the complete exported file with the sound turned on.
Check the following points:
- The gameplay is understandable from beginning to end.
- Important game text and score details are readable.
- The audio is clear and the narration does not overpower the game.
- No unwanted notifications or private information appear in the footage.
- The video plays correctly after export.
- You have kept an original copy for future editing.
A reliable recording routine is simple: choose a familiar route, start with moderate settings, record a short sample, and review the result. Increase the quality only when your phone can handle it consistently.
Smooth footage and clear sound are more useful than high settings that make your device struggle.